Most people think they can learn a yoga handstand in weeks or months, but the reality is different. A dedicated yoga instructor spent five years practicing consistently before achieving this challenging inversion. Your body needs a special mix of strength and flexibility because handstands engage all major muscle groups.
Building arm strength alone won’t get you there. Your shoulders must be both strong and flexible to keep your balance. The yoga handstand works like a plank position with your arms stretched overhead. This pose comes with amazing benefits – it builds upper body strength, stabilizes your core, boosts energy levels, improves blood flow, and sharpens focus. We have a long way to go, but we can build on this progress. You’ll need time, dedication, patience, and the right progression techniques to achieve this impressive position.
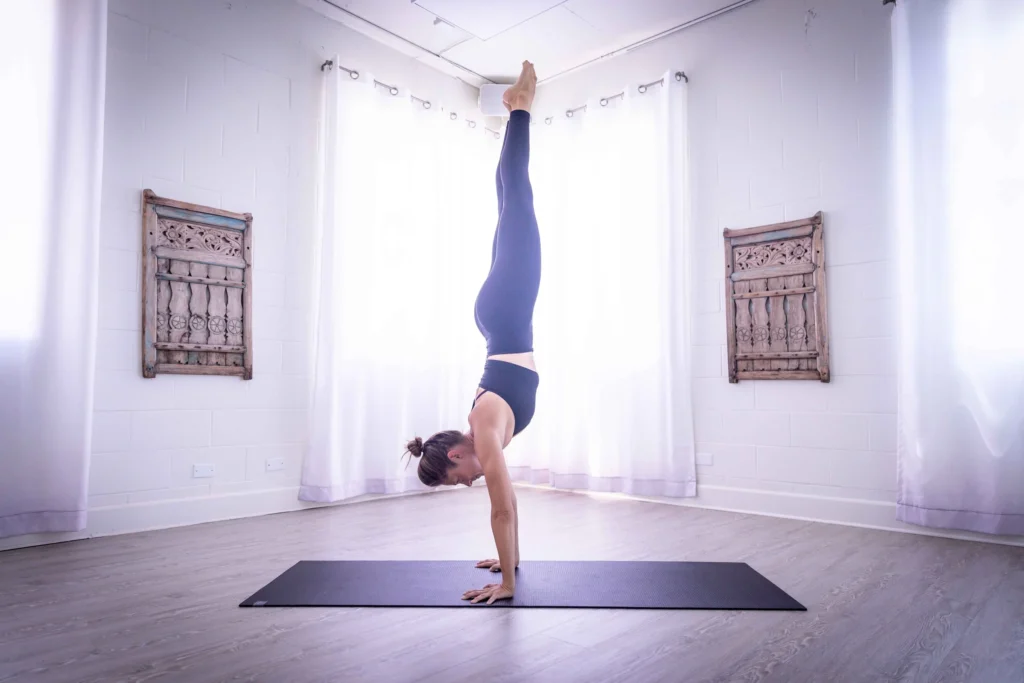
Table of Contents
- 1 The essential warm-up your instructor skips
- 2 Common mistakes in yoga handstands (and how to fix them)
- 3 Step-by-step guide to your first handstand yoga pose
- 4 Yoga handstand progression: from wall to freestanding
- 5 Mental blocks and fear: the hidden challenge of handstands yoga
- 6 Summing all up
- 7 Here are some FAQs about how to do a yoga handstand:
- 7.1 How long does it take to learn yoga handstand?
- 7.2 How do I train myself to do a handstand?
- 7.3 How to properly do a yoga headstand?
- 7.4 How to build strength for yoga handstand?
- 7.5 How to do a yoga handstand for beginners?
- 7.6 Can an unfit person do yoga?
- 7.7 Is it OK to do handstands everyday?
- 7.8 Can I learn handstand in 1 month?
- 7.9 What type of yoga teaches handstands?
The essential warm-up your instructor skips
Many yoga classes jump right into handstand attempts without proper preparation. This puts practitioners at risk of injury or frustration. A complete warm-up routine is the secret behind every successful yoga handstand, yet many instructors skip or rush through it. Your body needs this essential preparation to work every muscle needed for inversions, from wrists to core to hamstrings.
Wrist and forearm mobility drills
Your wrists support your entire body weight in a handstand yoga pose, which makes them easy to strain. You can’t skip proper wrist mobility. Start with gentle wrist circles in both directions, then add “flicking water” motions to wake up these joints.
Here’s a sequence of wrist preparations that works:
- Tabletop wrist stretches: From hands and knees position, make small circles with your upper body while keeping palms planted firmly. This builds mobility without strain.
- Backward wrist stretch: In tabletop, rotate fingertips toward your knees and lean back gently until you feel a mild stretch. Hold for 3-5 breaths, and repeat three times.
- Fingertip push-ups: Press into your fingertips from tabletop position and lift your palms slightly off the ground. This builds the stabilizing muscles you need for handstand yoga poses.
Note that wrist preparation should only create gentle stretching sensations—never pain.
Shoulder and chest opening techniques
You need shoulders that are both strong and flexible for a solid yoga handstand. Tight shoulders often lead to overarching in handstands and poor stability.
“Shoulder flossing” helps increase mobility in your shoulder girdle. Hold a strap between your hands wider than shoulder-width and keep your shoulder blades pulled downward. Your arms should lift overhead and behind you while maintaining gentle tension. Move overhead 10-15 times and focus on control rather than depth.
Chest-opening poses give you the upper body freedom you need for proper handstand alignment. You can use poses like Camel or gentle backbends to create space in your pectoral muscles. These poses help counter the forward-shoulder posture that comes from daily activities.
Core activation beyond crunches
Your handstand yoga success depends more on whole-body integration and core control than arm strength, despite what many believe.
Think of a handstand as “plank pose with arms overhead”. Build this awareness through plank poses with specific core work: pull your navel inward while creating opposing traction. You can do this by pulling your hands toward your feet and your feet toward your hands.
The “hollow body” position offers targeted core preparation. You maintain a slightly curved spine with ribs drawn inward. This matches the exact core engagement you need for stable handstand yoga poses.
Hamstring and quad prep for lift-off
Flexible hamstrings let you enter handstands with minimal momentum. Start with standing splits: place your fingertips on the ground from a forward fold. Slowly lift one leg up and back while keeping your hips square.
“Donkey kicks” help activate your quads. Kick one or both legs upward from a downward dog position. Do sets of 5-10 kicks and rest between sets to avoid shoulder fatigue. This builds the leg strength you need for controlled handstand entries.
Your warm-up quality directly affects your handstand yoga progress. These preparatory exercises take just 10-15 minutes and significantly improve your chances of achieving stable, aligned inversions.
Common mistakes in yoga handstands (and how to fix them)
Many yoga practitioners don’t deal very well with handstands even after warming up properly. The biggest problem lies in their basic form. You can make substantial improvements in your handstand practice and avoid injuries by fixing these common mistakes.
Not stacking wrists, shoulders, and hips
A solid handstand pose needs your body parts to line up correctly. Your body becomes unstable when wrists, shoulders, hips, and ankles don’t form one straight line. This poor positioning forces your body to compensate and puts extra stress on your shoulders, lower back, and wrists.
To fix this issue:
- Stack your bones by lining up all joints vertically
- Use a wall to feel the right alignment without worrying about balance
- Work on shoulder and hip mobility while building core strength
Your handstands become easier and more comfortable when your joints line up properly. This alignment reduces shoulder strain, takes pressure off your wrists, and gives you better control throughout the pose. A well-aligned body works with gravity instead of resisting it.
Overarching the back due to tight shoulders
The “banana shape” in your handstand shows more than just poor form—it points to an underlying issue. Tight shoulders usually cause this overarching, and your spine curves too much to make up for it. This pattern can hurt your lower back over time.
To fix the arch:
- Check your shoulder flexibility by reaching your arms up against a wall—if you can’t align wrists above shoulders comfortably, work on shoulder mobility first
- Do posterior pelvic tilt exercises to better control your pelvis position
- Build core strength, especially in your transverse abdominals and pelvic floor muscles
Note that an arched back often shows tight shoulders, weak core engagement, or looking forward too much, which pulls your chest forward. Working on these three areas creates a better foundation.
Kicking too hard or too soon
Some yoga students treat handstands like gymnastics moves and rely on momentum instead of control. This “kick and pray” approach builds bad habits and stops proper muscle development. Kicking too hard often leads to losing balance, which creates fear and frustration.
The fix is simple: only kick as high as you can control. Beginners should:
- Start with small kicks barely off the ground
- Focus on kick quality instead of height
- Build shoulder and forearm strength before full kicks
- Tighten abs, fingers, and forearms before kicking
Your kicks can gradually go higher as your control improves. This step-by-step approach builds physical strength and confidence.
Ignoring gaze and head position
Your handstand stability depends heavily on where you look. Looking too far ahead makes your chest follow, which creates that problematic arched back. Poor neck position can throw off your entire alignment.
For the right head position:
- Look between your hands or slightly beyond them
- Keep your neck neutral without craning back or tucking too much
- Create a straight line from arms through torso, with your head naturally aligned
- Relax your neck and use mainly your eyes to focus
You’ll build a stronger foundation for advanced inversions by fixing these common handstand mistakes. This approach leads to more rewarding progress in your practice.
Step-by-step guide to your first handstand yoga pose
Your trip to becoming skilled at yoga handstands starts by breaking the process into manageable steps. Many people think handstands need brute force or random kicking, but they actually need precise technique and body awareness. A systematic approach builds a solid foundation for your handstand yoga practice.
Start from Downward Dog
Downward Dog makes the perfect starting point for your handstand trip. Here’s how to position your hands:
- Set your hands shoulder-width apart with fingers spread wide
- Press more into your knuckle mounds and fingertips than into your hand’s heels
- Create a “suction cup” feeling in the palm center while gripping the floor with your fingers
- Keep your wrist creases parallel to the front of your mat
Look between your hands or slightly beyond them to keep your neck neutral. Roll your biceps toward the ceiling and triceps toward the mat. This creates external rotation in your shoulders and prevents neck strain.
Walk feet in and stack hips
The next crucial step that most people miss is stacking their hips over their shoulders.
- From Downward Dog, walk your feet closer to your hands
- Press firmly through your hands to lift your hips higher than your shoulders
- Feel your weight move into your hands and arms
- Create a solid vertical line from wrists through shoulders to hips
Note that proper hip stacking creates the foundation for balance in any handstand pose. Students often think their hips are stacked when they’re not—this awareness challenge needs focused attention.
Lift one leg and kick gently
Now you’re ready to start your ascent:
- Stack your shoulders over your wrists and lift one leg skyward
- Point your lifted foot’s toes down to keep hips square
- Slightly bend the grounded leg to prepare for push-off
- Push softly with the grounded foot while extending the lifted leg up
Yoga teachers warn against “kicking like a horse”—those wild, uncontrolled movements create bad habits. Practice controlled kicks that gradually reach higher as you build confidence.
Engage core and squeeze thighs
This final element turns an unstable position into a solid handstand:
- Draw your navel inward to engage your core
- Squeeze your inner thighs as if holding a block between them
- Keep pressing through your hands while reaching up through your heels
- Your body should form a straight line from fingertips to toes
Think of your handstand as a “plank position with arms overhead”. A strong core and aligned body distribute weight evenly, making the pose more stable.
Stay patient as you practice this progression. You don’t need to nail a full handstand right away. Focus on building proper technique and body awareness—these are the foundations of your handstand practice.
Yoga handstand progression: from wall to freestanding
The progression from wall-supported yoga handstands to freestanding inversions needs a methodical approach—not random balancing attempts. You’ll need well-laid-out steps to build physical strength and mental confidence. The wall becomes your trusted training companion throughout this trip.
Assisted pike holds
Pike holds are the foundations of handstand yoga practice. They help develop shoulder and core strength. Put your hands firmly on the ground and lift your legs into an inverted V-shape position. Your core and shoulders should stay active while your body stays lined up. This position teaches balance through muscle activation rather than momentum.
Beginners should start with feet elevated on a box or bench to create a pike position that’s easier to handle. Your strength will improve, and you can hold the position longer while keeping perfect form. This preparation builds muscle memory you’ll need for advanced yoga handstand poses.
Wall-supported handstand
The wall guides you vertically and helps perfect your alignment in handstand yoga practice. Face away from the wall in a downward dog position, then walk your feet up until your body creates a straight line. This back-to-wall technique helps you beat fear and build endurance.
The chest-to-wall handstand—where you face the wall—builds better alignment habits by stopping back-arching. Put your hands a shin’s distance from the wall, kick up, and let your nose and toes touch lightly. This version forces proper shoulder positioning that helps with freestanding handstand yoga poses.
Tuck handstand against wall
Tuck handstands improve your shoulder mobility. They make you push taller and flex your shoulders more. Get into a chest-to-wall handstand, then bend your knees to bring your thighs parallel to the floor. Keep your back flat and stack your shoulders over wrists.
The tuck position challenges many practitioners because it needs flexible shoulders. Start with slightly bent knees, then deepen the tuck as you become more flexible. This position strengthens delts and triceps while teaching correct shoulder positioning.
Partner-assisted balance drills
A partner can speed up your yoga handstand progress by giving support exactly when you need it. Common spotting techniques include:
- Shoulder spotting—your partner’s hands hover near your shoulders to stop forward collapse
- Hip spotting—hands near your hips prevent backward overbalancing
- Hybrid spotting—both approaches combine for complete support
Partner practice builds confidence. You can experience proper alignment without fear of falling. Your partner reduces assistance gradually, helping you move toward independent yoga handstand poses.
You need more than just physical technique to become skilled at yoga handstands – you must overcome the hidden barrier of fear. Many students have enough strength and flexibility but stay on the ground because of mental blocks that quietly hold them back.
Why fear of falling holds you back
Your handstand form changes completely when you’re afraid of falling. Your body fights against the right position when fear kicks in. This often shows up as an arched back during the kick-up, and you keep your belly close to the ground. This protective response stops you from finding your balance. Your mind resists change and new positions that feel uncomfortable. This creates a cycle where your fear of falling stops you from finding the right position.
How to train your nervous system
Falling turns out to be helpful, not harmful. Each controlled fall teaches your brain exactly what doesn’t work, which helps improve your next try. Start by learning safe ways to fall. Then slowly get used to being upside down with L-shaped handstands against a wall. On top of that, deep breathing during practice helps calm your body’s fight-or-flight response.
Building confidence with small wins
Your handstand trip needs celebration of small victories. Try practicing on different surfaces – grass, asphalt, and even slight slopes will help you adapt better. A good support system will speed up your progress by a lot. Partners can spot you physically and cheer you on. Pick one thing to improve in each session instead of trying to be perfect right away.
Summing all up
Learning yoga handstands goes way beyond physical strength. Most practitioners need years, not weeks, to gain stability in this challenging inversion. Patience will be your greatest asset during this process.
A proper preparation sets the foundation for handstand mastery. Your chances of success increase by a lot when you spend 10-15 minutes on detailed warm-ups. This also prevents unnecessary injuries. The right stacking of joints – wrists under shoulders under hips – forms the base for all handstand work.
Overarching the back or kicking without control are common mistakes that show areas to focus on rather than reasons to feel discouraged. You’ll gain more confidence and stability as you progress through wall-supported variations and partner work while paying attention to alignment.
Mental barriers often become the final hurdle between you and your handstand goals. Your form changes completely when fear of falling takes over, which prevents proper alignment. Small victories deserve celebration as they help foster the mindset needed for breakthrough moments.
Yoga handstands mirror life’s challenges – they just need focus, patience, consistent effort, and a willingness to fall. The real satisfaction comes not only from achieving the final pose but from embracing the whole process of growth and finding yourself. This challenging practice offers rewards that go way beyond physical benefits – better concentration, deeper body awareness, and the pure joy of achieving what once seemed impossible.
Here are some FAQs about how to do a yoga handstand:
How long does it take to learn yoga handstand?
The time it takes to learn a yoga handstand varies greatly depending on your starting strength, balance, and consistency of practice. For most people, it can take several months of regular training to achieve a stable handstand yoga pose.
How do I train myself to do a handstand?
You can train yourself to do a handstand by starting with wall-supported exercises and gradually building strength and balance. Consistent practice of yoga handstand progression exercises is key to developing the necessary control and confidence.
How to properly do a yoga headstand?
To properly do a yoga headstand, you should first build a stable foundation with your forearms and head, then engage your core to lift your legs. It’s important to learn this under supervision as part of your yoga handstand poses practice to avoid injury.
How to build strength for yoga handstand?
You can build strength for yoga handstand by focusing on core exercises, shoulder strengthening, and wrist mobility drills. These foundational elements are crucial for mastering various handstand yoga poses safely and effectively.
How to do a yoga handstand for beginners?
Beginners should start with wall-supported handstands to build confidence and strength. Practicing yoga handstand progression exercises like kicking up against a wall helps develop the balance needed for freestanding handstand yoga.
Can an unfit person do yoga?
Yes, an unfit person can absolutely do yoga, as there are modifications and beginner-friendly styles for every ability level. With consistent practice, even those starting from minimal fitness can work toward goals like yoga handstand over time.
Is it OK to do handstands everyday?
It is generally okay to practice handstands daily if you listen to your body and avoid overtraining. However, you should vary your handstand yoga practice intensity and include rest days to prevent wrist or shoulder strain.
Can I learn handstand in 1 month?
While some people with prior strength or gymnastics background might learn a handstand in a month, most beginners will need more time. A consistent yoga handstand progression approach over several months is more realistic for building the required strength and balance.
What type of yoga teaches handstands?
Ashtanga, Vinyasa, and Power Yoga are types that commonly incorporate handstand yoga poses into their practice. These dynamic styles emphasize arm balances and inversions as part of their sequences.