The yogi squat looks simple but packs powerful health benefits that research supports. Research from July 2014 shows older adults who had trouble getting up from the floor faced higher mortality risks compared to those who could do it easily. This finding emphasizes how important these fundamental movements are.
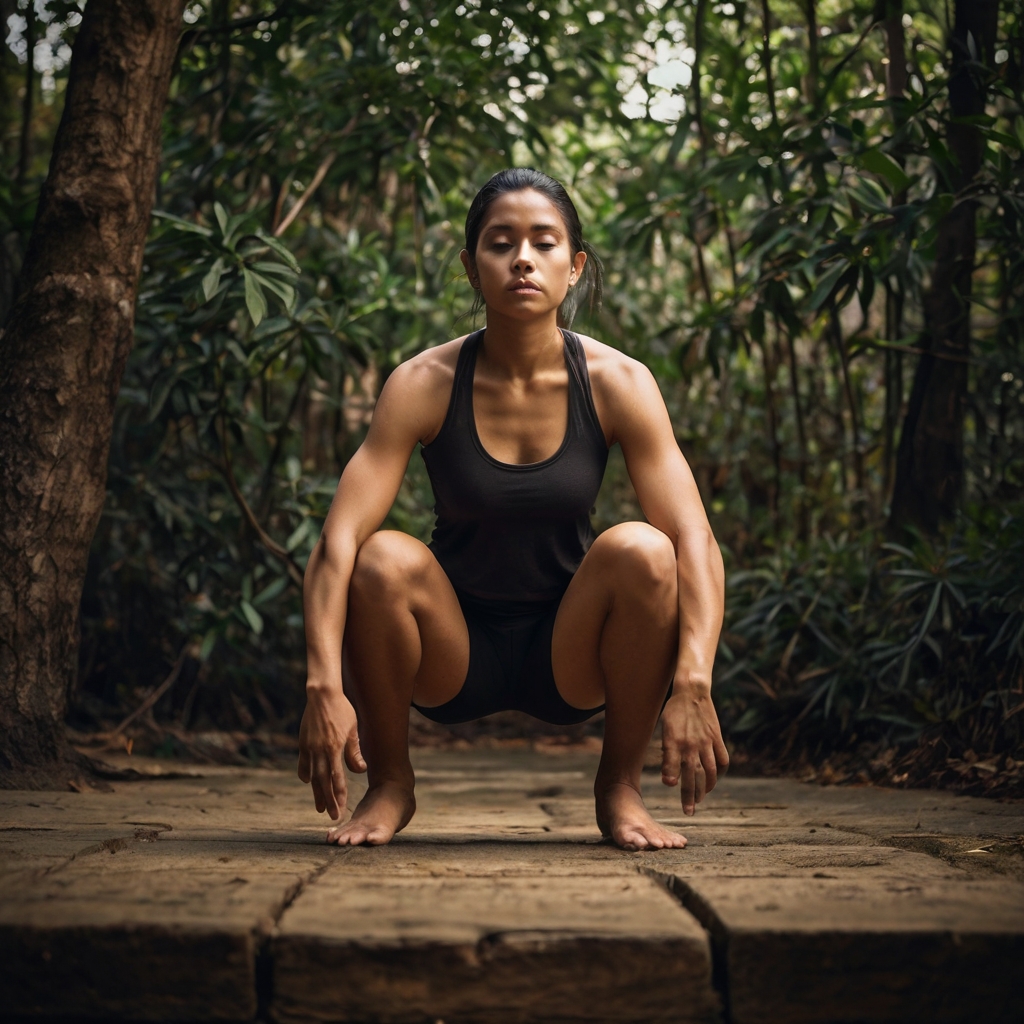
The yogi squat, also called Malasana or Garland Pose, uses the legs’ full range of motion while building lower body strength. The yogic squat benefits go beyond physical strength. A 2015 study shows Malasana squat, combined with 25 other poses, can reduce stress, depression, and anxiety during pregnancy. The benefits of yoga squat help improve digestion by promoting downward flowing energy that helps waste elimination, according to the Federation of Obstetric and Gynecological Societies of India. This squatting yoga pose makes everyday activities easier by opening the hips, strengthening the pelvic floor, and stretching the thighs, groin, ankles, and feet.
This piece explains everything beginners should know to learn the yogi squat safely and effectively. The guide specifically helps those who are new to this beneficial pose.
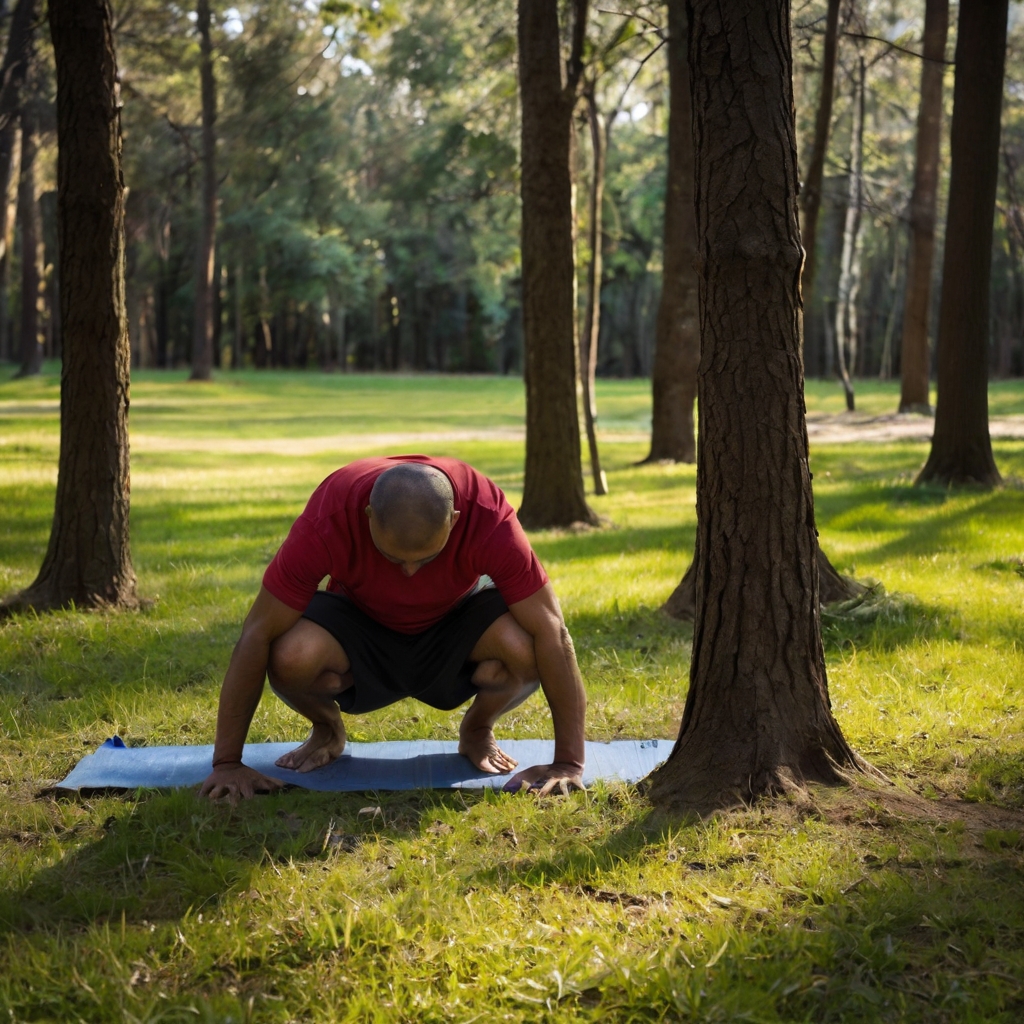
Table of Contents
- 1 What is Malasana (Yogi Squat)?
- 2 Top Benefits of Yogi Squat Pose
- 3 How to Do the Yogi Squat Step-by-Step
- 4 Modifications and Props for Beginners
- 5 Variations to Deepen Your Practice
- 6 Summing it all up
- 7 Here are some FAQs about the yogi squat:
- 7.1 What is the yogi squat good for?
- 7.2 How long should you do Malasana?
- 7.3 How long to hold a yogi squat?
- 7.4 What is the most powerful squat form?
- 7.5 What is the most beneficial squat?
- 7.6 Why is the squat king of exercises?
- 7.7 Who should avoid Malasana?
- 7.8 Can Malasana reduce belly fat?
- 7.9 How long should you be able to hold a wall squat?
What is Malasana (Yogi Squat)?
Malasana, also called the yogi squat, ranks among yoga’s simplest yet most meaningful postures. This ancient Indian practice carries deep cultural roots that remain relevant today.
Sanskrit meaning and cultural background
The word Malasana comes from two Sanskrit terms: “mala” and “asana.” The pronunciation creates two different meanings. A long “a” sound in mala means “garland” or “necklace.” A short “a” sound refers to “impurity” or “excrement”. These meanings reflect both what the pose looks like and what it does.
Ancient texts and sculptures show the yogi squat’s prominence, highlighting its importance in traditional practices. Classical Indian yoga used Malasana to help practitioners get ready for long meditation sessions.
Garlands hold special meaning in Hindu traditions. These decorative strings of flowers or beads serve as offerings to deities and altar decorations. Lord Shiva wears a Rudraksha seed garland while Lord Vishnu sports one made of leaves and flowers. A traditional mala has 108 beads connected in a circle. These beads symbolize life’s cycles – creation, sustenance, and transformation.
Why it’s called the Garland Pose
The name “Garland Pose” comes from how practitioners position their arms. Yoga master B.K.S. Iyengar explains that the arms hang “like a garland” from the neck. The full pose requires practitioners to wrap their arms around their shins and reach toward their lower back. This creates a circular shape similar to a mala.
Mala beads serve as tools for japa meditation. Practitioners repeat mantras 108 times – once for each bead. The body’s circular shape in this pose mirrors both the physical form and symbolic meaning of these meditation beads.
How it’s used in daily life in Eastern cultures
People of all cultures have naturally squatted for thousands of years. Eastern societies still use this traditional posture despite modern changes.
Visitors to India, Thailand, Bangladesh, Philippines, and other Southeast Asian countries often see people squatting. They squat to sell vegetables, read newspapers, or chat with friends. This practice helps these populations stay more flexible and agile than their Western counterparts.
The squat position remains essential in many Eastern cultures for:
- Using traditional squat toilets
- Working in agriculture and planting
- Preparing food on the ground
- Gathering socially and eating meals
Western societies have mostly stopped squatting because of chairs, modern toilets, and technology. B.K.S. Iyengar points out that babies naturally squat perfectly. This raises questions about why we lose this natural ability as we grow older.
The yogi squat helps us reconnect with a natural human movement that modern life has pushed aside.
Top Benefits of Yogi Squat Pose
The yogi squat brings amazing physical and mental benefits that go way beyond the reach and influence of the yoga mat. Your body and mind will thank you as this foundational pose gives complete advantages to everyone, regardless of their experience level.
Improves hip and ankle flexibility
Your hips and ankles will open up beautifully with the yogi squat. This pose works on your hips, groins, inner thighs, and ankles all at once. People who sit at desks for hours will find this pose helps fight the tightness in these areas.
The malasana squat lets your hip joints move more freely, which gives you better range of motion. Your hips, legs, and lower back will feel less stiff as you practice regularly. A yoga expert points out that this boost in flexibility helps people who are healing from small injuries or have weak knees.
Your ankles need to bend deeply in this pose, which helps them become more mobile and less stiff over time. This matters because our ankles get stiffer as we age unless we keep moving them on purpose.
Strengthens lower body and core
The yogi squat doesn’t just make you flexible – it builds strength in many muscle groups. The squatting position works on:
- Quadriceps, hamstrings, and gluteal muscles
- Calf muscles and lower back
- Core and pelvic floor muscles
The squat works nowhere near the same way as kegel exercises for pelvic floor strength. While kegels just tighten these muscles, the yogi squat creates a back pull on the sacrum that balances these essential muscles properly.
Your leg muscles build endurance as you hold this pose, which helps athletes and runners. Your core stays active throughout the pose, which builds ab strength and stability.
Supports digestion and pelvic health
The malasana position gently squeezes your belly area, which gets your digestive system moving. This natural pressure massages your digestive organs and gets the enzymes and digestive juices flowing.
The yogic squat helps apana—your downward-flowing energy that controls elimination—and eases constipation and other digestive problems. The Federation of Obstetric and Gynecological Societies of India says this squat boosts blood flow to your pelvis, which can help your digestion.
Women’s health gets special attention here. Regular practice can help with PCOS, infertility, or irregular periods. The squatting position works your pelvic floor and strengthens muscles that support reproductive organs.
Promotes calm and grounding
Your connection to the earth becomes stronger both physically and mentally with the yogi squat. This pose links to the Muladhara (Root) Chakra, which helps you feel stable and balanced.
The malasana brings peace through its connection to apana vayu, making it perfect to practice when you need to develop tranquility. You’ll naturally become more mindful and less stressed as you focus on holding this pose.
Deep breathing during this pose wakes up your vagus nerve, which helps your body relax into a peaceful state. This calming effect makes the yogi squat great for handling anxiety and keeping your mind steady.
Helps posture and spinal alignment
The yogi squat fights back against our sitting-heavy lifestyle. This pose counters the tightness you get from sitting in chairs all day. Your feet create a strong base that lifts your pelvic floor and lower abs, which helps line up your body properly.
Your body remembers its natural spine curves through this pose. This makes it perfect for movement breaks while working from home or at the office. Your lower back gets stronger too, which means less chance of back pain.
A proper malasana squat lengthens your spine and opens your chest and shoulders, which leads to better overall alignment. These benefits carry over into your daily life, helping you move better throughout your day.
How to Do the Yogi Squat Step-by-Step
You need proper technique and step-by-step practice to become skilled at the yogi squat. This basic posture can make a big difference in your lower body’s mobility and strength when you do it right. Let me break down each step so you can safely learn this helpful pose.
1. Start in mountain pose
Stand tall in Tadasana (Mountain Pose) with your feet about mat-width apart. Your toes should point slightly outward at a 45-degree angle. This helps your hips move better as you go down. A wider stance will keep you stable before you move into the full squat. Make sure your weight spreads evenly across both feet to create a strong base.
2. Lower into a deep squat
Bend your knees slowly and drop your hips toward the floor like you’re sitting in an invisible chair. Keep your spine long instead of rounded as you move down. Try to get your tailbone as close to the floor as you can without losing good form. Don’t worry if your heels come up at first – that’s normal for beginners. You can make it easier to keep your heels down by taking a wider stance.
3. Position your arms and spine
Place your upper arms against the inside of your knees once you’re in the squat. Push your elbows gently against your inner thighs. This creates resistance and opens your hips more. Bring your palms together at heart center in Anjali Mudra (prayer position). Your arm position lifts your chest and helps open your hips wider. Your forearms should line up almost parallel to the floor.
4. Hold and breathe
Pay attention to your breath while you hold the pose. Take deep breaths into your belly and fill the back and sides of your torso. Let your body sink deeper into the pose each time you breathe out. Start by holding the pose for 30 seconds to 1 minute. You can stay longer as it gets easier. Take five deep, mindful breaths before you either stand up straight or sit back on your mat.
The malasana squat is tough for most beginners because we don’t squat much in our daily lives. We have a long way to go, but we can build on this progress. Regular practice will make this pose more natural and give you great benefits for hip mobility and leg strength.
Modifications and Props for Beginners
Props and modifications help everyone practice the malasana squat, even beginners who find it challenging. The yogi squat gives you many benefits, but new practitioners don’t find it easy because of stiff ankles, hips, or knees. Simple adjustments let you practice safely and build your strength and mobility step by step.
Using a blanket under heels
Your heels might not stay on the ground during the yogi squat if you’re just starting out. This happens when your ankles aren’t flexible enough or your Achilles tendons feel tight. You can fix this by putting a folded or rolled blanket under your heels. The extra height helps you work on your ankle’s flexibility over time.
Start by placing the blanket behind your feet before you squat down. Make sure just your heels rest on the prop while your toes touch the floor. This setup helps spread your weight across your feet properly, so you won’t fall backward and can keep your body lined up right.
Wall support for balance
The wall is your friend when you’re learning the yogic squat. You can face it and hold on, or lean your back against it to stay steady. This prop builds your confidence while you develop balance and strength.
Stand about a foot away from a wall to try this. Lower yourself slowly like you’re sitting in an invisible chair. You can hold this position for 1-3 minutes to strengthen your lower body. The wall lets you focus on your form instead of worrying about falling over.
Block or pillow under hips
A block or cushion under your hips helps a lot if your hips aren’t very mobile yet. This change still lets you create space in your lower back and lift through your chest while supporting you.
Put the block at a height that feels right under your sitting bones before you squat down. The extra height takes pressure off your knees and keeps your spine straight. This version lets you get all the pose’s benefits without putting too much strain on your joints.
Towel behind knees for comfort
A neatly folded towel behind your knees creates a soft cushion that reduces pressure by a lot. This works really well if your knees feel sensitive or the backs of your legs are tight.
Put the towel in the crease behind both knees—not just one—to keep your pelvis and spine balanced. Check that the towel stays in place as you move into the pose. This small addition prevents too much pressure on your knee joint while letting you enjoy all the yogi squat’s benefits.
Variations to Deepen Your Practice
After you learn the simple yogi squat, you can explore several variations that challenge your practice and discover deeper benefits. These advanced versions of the malasana squat build upon your foundation and offer targeted effects.
Full Malasana with forward fold
This forward fold variation makes the hip opening more intense than the traditional yogi squat. Start in your regular malasana position, then exhale and bend forward to extend your torso between your inner thighs. You can deepen the stretch by sliding your armpits down your shins and reaching your arms behind your hips with palms up. Your back should form an even arc, keeping your tailbone and crown equally far from the floor. Gently pull your knees into your side ribs and relax your back muscles to settle into the pose.
Bound Malasana (Baddha Malasana)
Baddha Malasana adds an upper body challenge to your yogic squat. Start in Malasana, then wrap your arms around your legs’ outside and bring them behind your back. You can either interlock your fingers or hold wrist-to-wrist behind your lower back. This binding opens your shoulders significantly while it stabilizes the squat position. The variation needs more flexibility in both hips and shoulders but creates deep opening throughout your entire torso.
Revolved Malasana (Parivrtta Malasana)
The twisting variation strengthens your spine while you hold the squatting yoga pose. Begin in standard malasana and place both hands inside your legs. Raise one arm diagonally up as you twist your torso and look in that direction. Keep your other hand on the ground while pressing that arm against your leg. Parivrtta Malasana helps improve your balance, open your hips, and strengthen your spine.
Eagle arms in squat
Your shoulders open intensively when you combine Garudasana arms with your yogi squat. Cross one elbow over the other with wrapped forearms in your malasana position. You can choose from three options: hug yourself (great for those with larger chests), stack elbows with palms facing up, or cross forearms with backs of hands together. This variation releases tension between your shoulder blades.
Transitioning into arm balances
The yogic squat helps you move into arm balances like Bakasana (Crow Pose). Plant your hands firmly on the floor from malasana, lift your heels, and lean your weight forward over your hands. Bend your knees and point your toes toward your buttocks as your feet start lifting. Your core strength makes this transition possible, and it flows naturally from the squat position. Intermediate practitioners can master this movement with practice.
Summing it all up
The yogi squat is nowhere near just another yoga pose. It’s a simple human movement pattern that brings profound benefits. Eastern cultures have always embraced this position, while Western societies drifted away from it. Notwithstanding that, the malasana squat gives modern practitioners amazing health benefits.
This powerful pose strengthens your entire lower body. It works wonders for your pelvic floor muscles and works better than standard exercises. Your hip and ankle flexibility improves too, which helps counter the stiffness from long hours at your desk. The pose deserves credit for its digestive benefits. It softly massages your abdominal organs and promotes healthy elimination by activating downward-flowing energy.
Note that modifications work for every body type and flexibility level. You can use a blanket under your heels, support yourself against a wall, or place blocks beneath your hips. These adaptations make the pose available while delivering its core benefits. As you get comfortable with the simple position, you might explore variations. Bound Malasana or transitions into arm balances can take your practice deeper.
The yogi squat’s beauty lies in its simplicity. It challenges you at first, but steady practice reshapes your mobility, strength, and overall wellbeing. This ancient posture connects you to age-old traditions while meeting today’s physical needs. You should add this foundational pose to your daily routine. Try holding it while brushing teeth or waiting for coffee to brew. Your body knows these natural patterns, and with patience, this powerful position becomes enjoyable.
Here are some FAQs about the yogi squat:
What is the yogi squat good for?
The yogi squat (also known as Malasana) offers numerous benefits for flexibility and strength (yogi squat benefits). This deep squat pose helps open the hips, stretch the groin muscles, and improve digestion (yogi squat yoga pose). Regular practice can also strengthen the lower back and core while increasing ankle mobility (yogi squat).
How long should you do Malasana?
Beginners should start with holding Malasana for 30 seconds to 1 minute (yogi squat pose). Advanced practitioners can maintain the pose for 2-3 minutes to deepen the benefits (yogi squat sanskrit). Listen to your body and gradually increase duration as your flexibility improves (yogi squat yoga pose).
How long to hold a yogi squat?
Aim to hold the yogi squat for at least 30 seconds initially, building up to several minutes (yogi squat). The ideal duration depends on your flexibility level and comfort in the pose (yogi squat benefits). For therapeutic effects, longer holds of 1-2 minutes are most effective (yogi squat yoga pose).
What is the most powerful squat form?
The yogi squat (Malasana) is considered one of the most powerful functional squat forms (yogi squat sanskrit). Its full-range motion engages more muscle groups than partial squats (yogi squat benefits). For strength training, the barbell back squat is often called the “king” of weighted squats (yogi squat yoga pose).
What is the most beneficial squat?
The yogi squat offers unique benefits for flexibility and joint mobility (yogi squat). For overall strength, the bodyweight squat and goblet squat are highly beneficial variations (yogi squat pose). The most beneficial squat depends on your specific goals – mobility vs. strength (yogi squat benefits).
Why is the squat king of exercises?
Squats earn the “king” title because they engage multiple major muscle groups simultaneously (yogi squat sanskrit). The yogi squat specifically promotes functional movement patterns used in daily life (yogi squat yoga pose). This compound movement boosts strength, mobility, and circulation (yogi squat benefits).
Who should avoid Malasana?
Those with recent knee or hip injuries should avoid or modify the yogi squat (yogi squat pose). Pregnant women in later trimesters may find this pose uncomfortable (yogi squat benefits). People with severe ankle mobility issues should use props under their heels (yogi squat yoga pose).
Can Malasana reduce belly fat?
While the yogi squat strengthens core muscles, spot reduction of belly fat isn’t possible (yogi squat). This pose can contribute to overall fat loss as part of a comprehensive fitness routine (yogi squat benefits). Its twisting variations may help tone abdominal muscles (yogi squat sanskrit).
How long should you be able to hold a wall squat?
Aim to hold a basic wall squat for 30-60 seconds as a beginner (yogi squat yoga pose). Intermediate practitioners can work up to 2-3 minute holds (yogi squat). Advanced athletes may maintain proper form for 5+ minutes (yogi squat benefits).
One Response